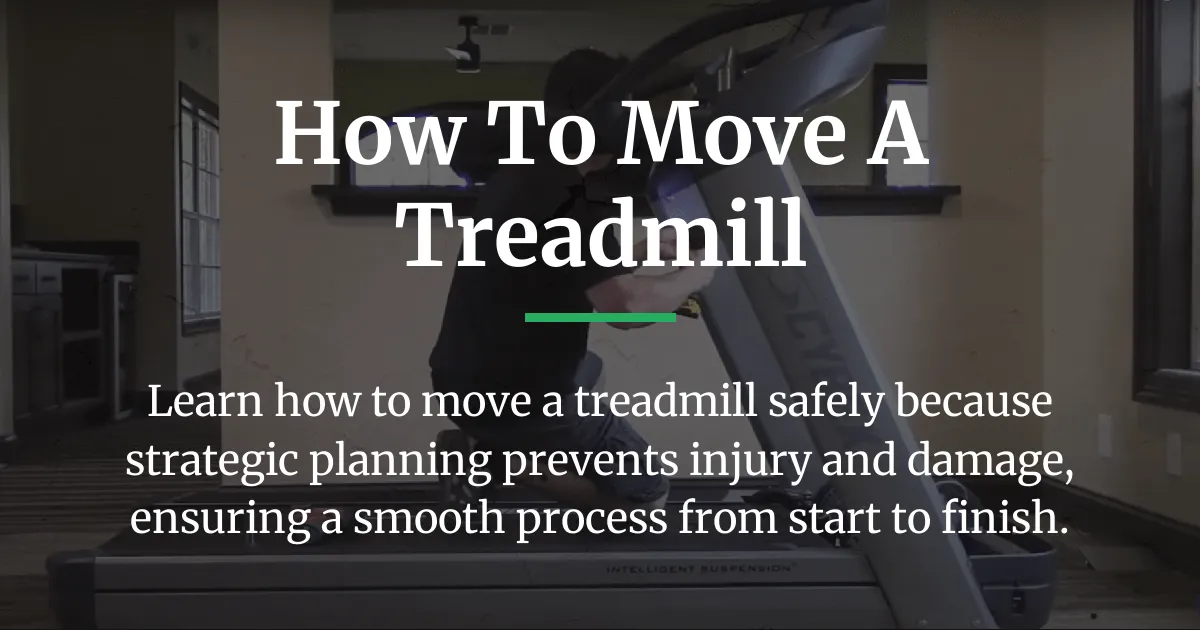
Moving a treadmill is a common challenge. These machines are heavy, awkward, and expensive to damage. This guide goes beyond basic steps. It provides a clear framework for moving any treadmill safely. You will learn how to protect both the equipment and yourself. We cover everything from small home models to large commercial units. The key is careful planning and the right approach.
How to Move a Treadmill: Assess Your Situation
Every successful move starts with a good plan. Do not just start lifting. First, understand what you are dealing with. This step saves time and prevents accidents. It helps you decide if you need help or special tools. Rushing this phase leads to damage or injury.
Determine Treadmill Type and Weight
First, identify your treadmill model. Look for a manual or a label on the frame. This label often has the model number and weight. Knowing the exact weight is crucial. A lightweight home model may weigh 150 pounds. A commercial unit can be over 300 pounds. This is an absolute monster to move.
Check if your treadmill has folding upright arms. Some models fold for easier storage. Others have fixed upright arms that do not move. Folding consoles can sometimes be secured out of the way. Fixed arms make the machine wider and harder to maneuver. This affects how you navigate doorways.
Also, note any extra features. Some treadmills have built-in screens or data cables. These parts can be delicate. You might need to disconnect them carefully. Knowing the weight and size helps you plan the move process. It tells you how many people you need. It also shows if disassembly is necessary.
Map the Journey Thoroughly
Walk the entire path from start to finish. Measure all doorways, hallways, and staircases. A standard doorway is usually about 30 inches wide. Your treadmill might be wider than that. You may need to turn it sideways or remove parts.
Look for permanent obstacles like his desk or tight corners. Note any stairs involved. Moving to the first floor is simpler. Moving upstairs or downstairs adds major difficulty. Check for narrow landings or sharp turns. This map decides everything. It tells you if you can move the treadmill in one piece.
Consider the final placement spot. Ensure there is good air flow around the machine. Make sure a normal outlet is nearby. Some heavy treadmills need a dedicated circuit. This planning prevents last-minute problems. It is your moving checklist for this large heavy item.
DIY or Professional Movers? A Clear Decision Matrix
This is a critical choice. You must balance cost, risk, and effort. Use this simple guide to decide. First, consider the weight and path. If the treadmill is over 250 pounds, you need strong help. Even with friends, it is risky.
Think about stairs. One flight of stairs with a heavy treadmill is a red flag. It is very dangerous without proper equipment. You might need a piano dolly or special straps. Professional movers have these tools. They also have insurance for other damage.
Now, consider your helpers. Brothers friends might offer to help. But are they reliable? Moving a treadmill requires same care as moving a washing machine. Everyone must lift at the same time. If no one has experience, hire pros. Local two men with a truck might be affordable.
Here is a simple matrix. If your treadmill is heavy and stairs are involved, hire a moving company. If it is light and on the same floor, you can do it yourself with friends. Always put safety as the top priority. The risk of injury is high. Professional help is often worth the cost.
Prepare the Area and Your Treadmill
Preparation is the key to a smooth move. This phase protects your home and the treadmill. You will gather tools and clear the path. You might also disassemble some parts. Do only what is necessary for easier transportation.
Gather the Right Equipment
Based on your assessment, collect these items. You will need furniture pads to protect surfaces. Use a carpet shield if moving over carpet. It prevents tears and slides. For the treadmill itself, have a set of basic tools. This includes screwdrivers and wrenches.
You will need a dolly for heavy units. A two-wheel dolly works for flat surfaces. An appliance dolly is better for stairs. Ratchet straps are essential. They secure the treadmill to the dolly. Do not forget protective gloves for everyone. This equipment ensures a safe way to move.
Also, have a phone handy. You might need to call a customer service representative for your treadmill model. They can give specific disassembly tips. This is part of your complete list for the move. Having everything ready saves time and reduces stress.
Clear and Protect the Path
Remove all rugs and loose items from the path. Move chairs, tables, and other items out of the way. This includes her keyboard or any small objects. Sweep the floor to remove debris. Debris can cause slips or scratches.
Lay down protective covering on floors. Use cardboard or old blankets. This is especially important for hardwood or tile. It prevents scratches and other damage. Pay attention to door frames and walls. Use padding on corners to avoid dents. This preparation makes the physical move much smoother.
Ensure the path is well-lit. Good lighting helps you see obstacles. It also improves communication with your team. Everyone should know the plan. Assign one person to guide the move. This person watches for tight spots and directs the team.
Safe Treadmill Shutdown and Partial Disassembly
Start by unplugging the treadmill from the wall. Do this first for safety. Secure the power cord so it does not dangle. You can tape it to the frame. This prevents tripping and damage to the cord.
Now, decide if disassembly is needed. Refer to your path map. If doorways are narrow, you might remove the upright arms. Use your tools to loosen the screws. Often, there are just a few wire connections for the console. Label these wires with tape. Note where each data cable goes. This makes reassembly easier.
Some treadmills have a console that detaches. Remove it carefully. Place all screws and small parts in a bag. Tape this bag to the main frame. Do not disassemble the motor or drive system. That is complex and can void warranties. Only take apart what is necessary for the move. For a folding treadmill, you might just fold it and secure the frame.
If your treadmill has a battery backup, disconnect it. Check the manual for instructions. Usually, it is a simple process. This prevents any electrical issues during the move. Now, the treadmill is ready for transportation.
Execute the Physical Move
This is the action phase. Move slowly and communicate constantly. Use proper techniques to avoid injury. The goal is to get the treadmill from point A to point B without damage.
Proper Lifting Technique with a Team
Never try to move a treadmill alone. Even with wheels, it is too risky. Enlist at least two strong friends. More people are better for heavy units. Stand on opposite sides of the treadmill. Everyone should bend their knees and keep their back straight.
Lift with your legs, not your back. On the count of three, lift together. Move slowly and in small steps. The person at the front should guide the team. Watch for obstacles like his desk or door frames. If you need to turn, pivot the treadmill carefully. Do not twist your body while lifting.
Communication is key. Use simple commands like “lift,” “walk,” and “stop.” If someone feels strain, stop immediately. Adjust your grip or take a break. The safe way is to move steadily without rushing. This protects everyone from strain injuries.
Using a Dolly Correctly
For heavy treadmills, a dolly is a must. Tilt the treadmill back gently onto the dolly. Use the wheels if your model has them. But do not rely on them for long distances. The dolly provides stable support.
Center the treadmill on the dolly. Secure it with ratchet straps. Wrap the straps around the frame and dolly. Tighten them so the treadmill cannot shift. This is crucial for navigating stairs or bumps. A loose treadmill can fall and cause serious damage.
Now, push the dolly slowly. Have one person pull from the front and another guide from the back. Keep the load balanced. Avoid sudden stops or turns. On flat ground, this method is efficient. It reduces the physical strain on your team.
Navigating Stairs and Tight Corners
Stairs are the biggest challenge. If possible, avoid them. But if you must use stairs, extra caution is needed. For going downstairs, use an appliance dolly. These dollies have stair-climbing features. Have multiple spotters. One person below to guide and two above to control the descent.
Move one step at a time. Keep the treadmill tilted slightly backward. This prevents it from tipping forward. Communicate every move. If the staircase is narrow, you might need to carry the treadmill. This requires even more people. Consider hiring professionals for this task.
For tight corners, plan your angles. Measure the space before you move. You may need to tilt the treadmill vertically. This is called “walking” it around a corner. Place furniture pads on the walls for protection. Move slowly and adjust as needed. Patience prevents scrapes and dents.
If moving through a standard doorway, turn the treadmill sideways. Remove the upright arms if necessary. This reduces its size for easier passage. Have someone guide each end through the door. Do not force it. If it does not fit, disassemble more parts. The goal is a smooth move without damage.
Post-Move Calibration and Safety Check
The move is not over when the treadmill is in place. You must set it up correctly. This ensures it works properly and safely. Skipping this step can lead to motor issues or belt damage.
Final Placement and Leveling
Place the treadmill in its new spot. Leave space on all sides for good air flow. This prevents the motor from overheating. Check that the floor is level. An unlevel floor causes belt wear and motor strain.
Use a spirit level on the deck. Adjust the treadmill feet until it is level. Most treadmills have adjustable feet at each corner. Turn them clockwise or counterclockwise. This step is crucial for long-term performance. It also reduces noise during use.
Ensure the treadmill is not near walls or other items. There should be at least three feet of clearance behind it. This is for safety during use. Also, check that the power cord can reach a normal outlet easily. Avoid using extension cords if possible.
Reassemble and Reconnect
If you disassembled parts, now reassemble them. Start with the upright arms. Attach them to the frame using the screws you saved. Tighten them securely but do not overtighten. Overtightening can strip the threads.
Reconnect any data cables or wiring harnesses. Refer to the labels you made earlier. Each connection should click into place. Ensure no wires are pinched or loose. This restores all extra features like console displays.
Reattach the console if you removed it. Secure it with the provided screws. Double-check all connections. A loose part can rattle or fail during use. Take your time to do this right. It guarantees the treadmill functions as intended.
Belt Alignment and Tension Check
Moving can shift the belt. You need to check its alignment. Start the treadmill at a very slow speed. Watch the belt as it moves. It should run centered on the deck. If it drifts to one side, it needs adjustment.
Most treadmills have adjustment bolts at the rear. Use a wrench to turn these bolts. Turn them slightly to center the belt. Do this with the treadmill off. Then test again. Repeat until the belt runs straight.
Also, check the belt tension. Press down on the belt with your hand. It should have a little give but not be loose. A loose belt can slip and damage the motor. Refer to your manual for specific tension guidelines. Proper alignment and tension extend the life of your treadmill.
Electrical and Functional Test
Now, plug the treadmill into a normal outlet. Ensure the outlet is on a dedicated circuit if required. Some heavy models need a NEMA 5-20 adapter. Check your manual for electrical specs. Do not plug it into the same circuit as other large appliances.
Turn on the treadmill. Start at the lowest speed. Listen for unusual noises. Any grinding or squeaking could indicate damage. Test all functions slowly. Increase the speed gradually. Check the incline feature if your model has it.
Test the safety key and emergency stop. These features must work perfectly. Walk on the treadmill for a few minutes. Feel for any vibration or irregular movement. If everything seems normal, the move was successful. If you hear strange sounds, turn it off and inspect. You might need to call a technician.
This post-move check is essential. It ensures your treadmill is safe to use. It also confirms that no internal parts were harmed during the move. Taking these steps protects your investment and your safety.
Frequently Asked Questions
How do I move a treadmill through a standard doorway?
First, measure the doorway and your treadmill. If the treadmill is wider than the door, turn it sideways. You may need to remove the upright arms to reduce width. Use furniture pads to protect the door frame. Have one person guide each end through slowly. Do not force it; disassemble more if necessary.
What is the safest way to move a treadmill down stairs?
The safest method is to use an appliance dolly designed for stairs. Secure the treadmill to the dolly with ratchet straps. Have at least three people: one to control the dolly and two as spotters. Move one step at a time, keeping the treadmill tilted back. For heavy units, strongly consider hiring professional movers with experience.
Can I move a treadmill by myself if it has wheels?
It is not recommended. Even with wheels, treadmills are top-heavy and can tip. The weight is often over 150 pounds, which is too much for one person to control safely. Always enlist help to prevent injury and damage to the treadmill or your home.
Do I need to drain any fluids or disconnect the battery before moving a treadmill?
Most treadmills do not have fluids. However, if your model has a battery backup for memory functions, disconnect it. Refer to the manual for instructions. This prevents short circuits during the move. No draining is required for standard electric treadmills.
What type of dolly is best for moving a heavy treadmill?
An appliance dolly is ideal. It has straps and a design for heavy items. A two-wheel dolly can work for flat surfaces, but an appliance dolly provides better control, especially for stairs. Avoid using a simple hand truck; it may not secure the treadmill properly.
How do I move a treadmill upstairs by myself?
You should not move a treadmill upstairs by yourself. It is extremely dangerous due to the weight and risk of falling. Always have at least two strong helpers. Use an appliance dolly and multiple spotters. For safety, hiring professionals is the best choice for upstairs moves.
Can I move a treadmill in a pickup truck or Dodge Caravan?
Yes, but you must secure it properly. Use a moving truck with a ramp if possible. For a Dodge Caravan, fold the seats and protect the interior with furniture pads. Secure the treadmill with straps to prevent shifting during transport. Cover it to protect from weather if in an open truck.
Do I need to recalibrate the treadmill after moving it?
Yes, recalibration is important. Check the belt alignment and tension as described in the post-move section. Also, ensure the deck is level. These steps calibrate the treadmill for safe and efficient operation after the move.
What should I do if my treadmill is too heavy for my friends?
If your friends cannot safely lift the treadmill, hire professional movers. Look for local two men and a truck services. They have the equipment and experience to handle heavy items like treadmills. It is safer and often cost-effective when considering risk of injury.
How can I protect my floors when moving a treadmill?
Use furniture pads under the treadmill feet or dolly wheels. Lay down a carpet shield or cardboard along the path. This prevents scratches and dents. Move slowly and avoid dragging the treadmill; always lift or use a dolly.
Learning how to move a treadmill successfully depends on careful planning. The assessment and preparation phases are just as important as the lifting. By following this strategic guide, you can make informed choices. You will protect your equipment and ensure a safe move for everyone involved. Remember, taking your time and using the right help leads to the best results.